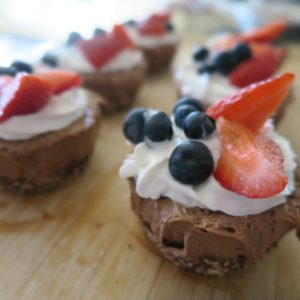
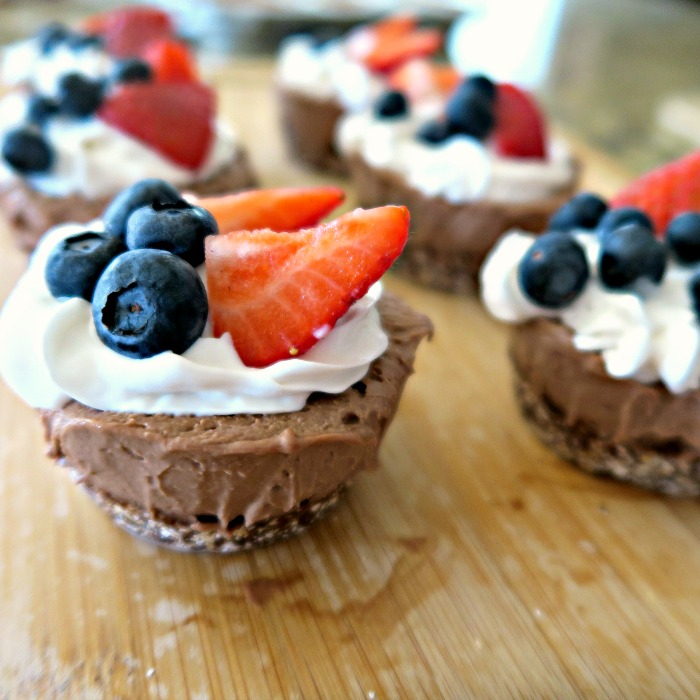
This vegan chocolate cheesecake recipe will have your taste buds going crazy! Plus, it’s no-bake and gluten-free – a great option for any gathering.
These are tasty all year round, but add raspberries and blueberries and they’re perfect for the 4th of July too! I’d say this chocolate cheesecake recipe won’t disappoint!

No-Bake Gluten-Free Vegan Chocolate Cheesecake
Rate this Recipe!
No ratings yet
Course Dessert
Prevent your screen from going dark
Ingredients
Crust
- 1¼ cups packed Medjool dates pitted
- 1½ cups gluten-free rolled oats or use regular rolled oats if not gluten-free
- 3 Tbsp unsweetened cocoa or cacao powder
- Pinch sea salt
Filling
- 1½ cups raw cashews soaked in water 4-6 hours, then drained OR soaked in boiling water for 1-2 hours
- 3 Tbsp fresh lemon juice
- 1 14-ounce can full-fat coconut milk you can use light coconut milk or another non-dairy milk for a less creamy result
- 7 ounces dairy-free dark chocolate melted
- ¼ cup liquid sweetener maple syrup, agave, honey, etc.
Toppings
- Fresh berries
- Soy/Coconut/Fresh Whipped Cream
Instructions
- If you have dried dates, soak in water for 10 minutes and drain before using. Blend dates in a food processor until it forms into a ball. Remove and set aside.
- Add oats, salt, and cocoa powder into the food processor and blend into a meal. Then add dates back in and blend until loose dough forms. It should stick together when gently squeezed. If it's too dry, add a few more dates and if too wet, add more oats.
- Cut out parchment paper into circles the shape of your muffin tins or pan. Then, cut out two strips of parchment paper per circle and lay them in an "X" shape at the base of each muffin tin. Top with circle shape. This will make lifting each cheesecake out of the tin easier.
- Divide crust evenly and carefully press with fingers to distribute. Really press it down, allowing some crust to come up the sides. Let the crusts sit in fridge or freezer to firm up.
- Add all filling ingredients to a blender and mix until very smooth - up to 2-3 minutes. Add more maple syrup, agave, or coconut milk if it won't come together as the liquid should help it blend. Scrape down sides as needed and blend until very creamy and smooth. Taste and adjust as needed.
- Pour filling evenly into the set crusts. Tap a few times to release any air bubbles, then cover loosely with plastic wrap and refrigerate about 4-6 hours or freeze 1-2 hours, depending on the size of your cheesecakes.
- Once set, run a butter knife around the edge of a cheesecake and gently remove by pulling the tabs upward. If they are set properly, they should pop right out. If not, pop them in the freezer for 15-20 minutes, and they should come out easily.
- Top with whipped cream and fresh berries, or enjoy as is! See notes for storage.
Notes
*These store well in the fridge for a few days, and in the freezer for up to a few weeks! They are perfect to bring to a party because they stay firm at room temperature for a couple of hours.
*Recipe creates four medium-sized cheesecakes (made in ramekins), ~12 mini cheesecakes (made in muffin tins), or 1 large cheesecake (made in a round cake pan).
*Loosely adapted from Minimalist Baker.
Tried this recipe?Tag @melissashealthyliving on Instagram!
Check out the video on SuperKids Nutrition’s Instagram!
